在这过程中:
① 在uniapp中我之前想的是直接将我的view那一块直接转为海报图片,不可行
② 海报的图片是我点击分享给每个好友使才出现的,之前使用的是UI制作的图,进行自定义的分享、收藏、保存,当然也不可行
一、绘画海报
绘画海报,我使用的是uniapp的canvas进行要求绘制,https://uniapp.dcloud.net.cn/component/canvas.html#canvas
① 这是我需要将canvas放置的位置 必须包含canvas-id、id这个两个属性【最好两个属性名取一致】,绘制的时候是根据它来查找
② 当然就是绘制的逻辑了,当中canvas使用的方法在uniapp官网中,API下面的绘画中,https://uniapp.dcloud.net.cn/api/canvas/CanvasContext.html#canvascontext-drawimage
在开发中,我的单位为rpx,为了能够适应各种机型选择的
// 绘制图片captureViewAsImage() {const resScreen = uni.getSystemInfoSync(); // 获取当前设备的宽度 高度 单位为pxconst screenWidth = resScreen.screenWidth;const screenHeight = resScreen.screenHeight;// 绘画盒子的宽度 高度 单位rpxconst boxWidth = 614;const boxHeight = 900;// 获取canvas上下文对象const pxRatio = screenWidth / 750;// canvas宽度const width = boxWidth * pxRatio;// canvas高度const height = boxHeight * pxRatio;const canvasBox = uni.createCanvasContext('firstCanvas', this,width,height);const borderRadius = 20; // 圆角半径// 绘画圆角矩形 【如果需要再写】this.clipRectangle(canvasBox, width, height, borderRadius * pxRatio)// 绘制当前图片uni.getImageInfo({src: 填写你需要展示的图片地址,success: res => {const imgWidth = res.width; // 原始图片宽度const imgHeight = res.height; // 原始图片高度const targetWidth = 308; // 目标宽度// 根据目标高度计算等比例的宽度const targetHeight = Math.floor((imgHeight / imgWidth) * targetWidth);canvasBox.drawImage(res.path, 0, 0, targetWidth, targetHeight);// 绘制底部白色区域const whiteHeight = 200; // 底部白色区域的高度canvasBox.fillStyle = '#fff'; // 设置填充颜色为白色canvasBox.fillRect(0, height - whiteHeight * pxRatio, width, whiteHeight * pxRatio);// 绘制Logo图片canvasBox.drawImage('logo图片地址', 14, (height - 114 + 160) * pxRatio, 70, 70);// 绘制二维码canvasBox.drawImage('二维码图片地址', 220, (height - 114 + 355) * pxRatio);// 绘制文字// 字体大小canvasBox.setFontSize(17);// 字体颜色canvasBox.setFillStyle('#333');// 文字canvasBox.fillText('你小程序的名字', 14, (height - 114 + 400) * pxRatio);canvasBox.setFontSize(14);canvasBox.fillText('你设置的文字', 14, (height - 114 + 470) * pxRatio);// 调用draw方法进行绘图canvasBox.draw(false, () => {// 将绘制结果保存为图片uni.canvasToTempFilePath({canvasId: 'firstCanvas',success: res => {console.log('生成图片成功', res.tempFilePath);// 调用微信内置的分享界面wx.showShareImageMenu({path: res.tempFilePath,success: res => {console.log("success:", res);this.isShowShare = false},// 取消fail: err => {console.log("fail:", err);this.isShowShare = false}})},fail: err => {console.log('生成图片失败', err);}}, this)});}})},二、裁剪成圆角矩形的图形
结合绘画中的代码,这部分是将我绘制的矩形改为圆角矩形
clipRectangle(canvasBox, width, height, borderRadius) {// 绘制圆角矩形路径canvasBox.beginPath();canvasBox.moveTo(borderRadius, 0)canvasBox.arcTo(width, 0, width, height, borderRadius)canvasBox.arcTo(width, height, 0, height, borderRadius)canvasBox.arcTo(0, height, 0, 0, borderRadius)canvasBox.arcTo(0, 0, borderRadius, 0, borderRadius)canvasBox.closePath()// 设置线条连接处为圆角canvasBox.lineJoin = 'round';// 画布裁切canvasBox.clip();// 裁剪完剩下的地方填充的颜色canvasBox.fillStyle = '#fff';canvasBox.fill();},
三、实现微信中的分享、保存、收藏功能
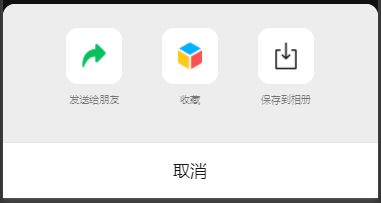
这个自定义的,我试了不行,不知道还有其他方式不,我后面改成了微信自己的分享,点击后弹出如图的效果

这个效果需要微信内置的wx.showShareImageMenu,实现图片分享,代码如下,如果实现文字等其他分享可查看