目录
日常中,想必许多人都会碰到一个常见的需求:文件分享。如果只是简单的小文件,直接通过微信、QQ发送即可,但若是一个几G的文件,又或者有大量文件,又或者需要分享给许多人,该如何是好呢?
可能你会说直接用网盘挺好的,然而各种网盘非会员限速,数据安全和隐私性更是毫无可言。数据掌握在自己手里才是最可靠的,而我们服务器基本都会部署Nginx,所以今天我们就来利用Nginx搭建一个文件下载站。
autoindex使用 Nginx 来做静态资源服务器可谓是十分基础的功能了,默认情况下 Nginx 并不允许列出整个目录的内容,不过可以通过配置 autoindex 模块手动开启。
先来看最简单的示例,在 /etc/nginx/sites-enabled 下新建一个配置:
server {listen 8080;root /var/www/data;location / {autoindex on;}}然后 reload 一下 nginx:
$ sudo nginx -t$ sudo nginx -s reload这样子,访问 http://127.0.0.1:8080 就可以看到 /var/www/data 目录下的文件列表了:
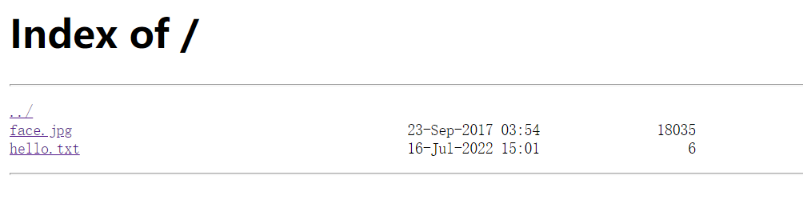
除了 autoindex,还有几个相关的参数可以配置一下:
autoindex_exact_size on | off:off 不显示详细字节大小,会自动换算为GB、MB、KB显示;autoindex_localtime on | off:on 使用本地时间,默认是UTC;autoindex_format html | xml | json | jsonp:以指定格式返回文件列表;root & alias在上面的配置中,我们使用 root 指定根目录 / 映射到 /var/www/data。
那如果想要在某个二级目录开启autoindex,比如 /data2 映射到 /var/www/data2,该如何配置呢?
server {listen 8080;root /var/www/data;location / {autoindex on;}location /data2 {root /var/www;autoindex on;}}那如果想将 /data3 映射到 /var/www/d3,又该如何配置呢?
server {listen 8080;root /var/www/data;location / {autoindex on;}location /data2 {root /var/www;autoindex on;}location /data3 {alias /var/www/d3;autoindex on;}}直观感受一下 root 和 alias 配置的区别:
root:将请求的路径附加到指定的路径之后,即 /data2 -> root /var/www = /var/www/data2;alias:直接替换请求的路径,即 /data3 -> alias /var/www/d3 = /var/www/d3;auth如果文件不想任何人都可以下载,还可以给 nginx 设置访问密码。
首先用 htpasswd 这个工具来生成密码,由于这个工具包含在 Apache 软件包中,我们并不想安装太多其他东西,所以可以用 docker 来执行,或者在线生成密码:
$ docker run --entrypoint htpasswd httpd:2 --helpUsage:htpasswd [-cimBdpsDv] [-C cost] passwordfile usernamehtpasswd -b[cmBdpsDv] [-C cost] passwordfile username passwordhtpasswd -n[imBdps] [-C cost] usernamehtpasswd -nb[mBdps] [-C cost] username password -c Create a new file. -n Don't update file; display results on stdout. -b Use the password from the command line rather than prompting for it. -i Read password from stdin without verification (for script usage). -m Force MD5 encryption of the password (default). -B Force bcrypt encryption of the password (very secure). -C Set the computing time used for the bcrypt algorithm (higher is more secure but slower, default: 5, valid: 4 to 17). -d Force CRYPT encryption of the password (8 chars max, insecure). -s Force SHA encryption of the password (insecure). -p Do not encrypt the password (plaintext, insecure). -D Delete the specified user. -v Verify password for the specified user.On other systems than Windows and NetWare the '-p' flag will probably not work.The SHA algorithm does not use a salt and is less secure than the MD5 algorithm.$ docker run --entrypoint htpasswd httpd:2 -Bbn testuser testpasswordtestuser:$2y$05$nP/kVrCbwCRUyUUMXi9o4uuT34h17ArFWE03ldEPk.uDddtws7Z5u然后将生成的“用户名:密码”保存到某个文件(/etc/nginx/htpasswd)中,再修改nginx配置:
server {listen 8080;root /var/www/data;auth_basic "Authorized";auth_basic_user_file /etc/nginx/htpasswd;location / {autoindex on;}}这时候访问就需要输入密码啦~
fancyindex按照前面的配置已经可以正常浏览指定目录里的文件了,然而你可能会觉得界面过于简陋……这时就可以试试 nginx 的另一个第三方module:fancyindex。
网上对于这个模块的安装有很多相似的教程,无一例外都是重新编译nginx,麻烦至极。
其实 nginx 早就支持 dynamic module,在 ubuntu 下更是可以直接通过 apt 安装:
$ sudo apt install libnginx-mod-http-fancyindex然后将之前 autoindex 的配置改为 fancyindex 即可:
server {listen 8080;root /var/www/data;location / {fancyindex on;}}将配置 reload 之后再来看一下,是不是好看多了:
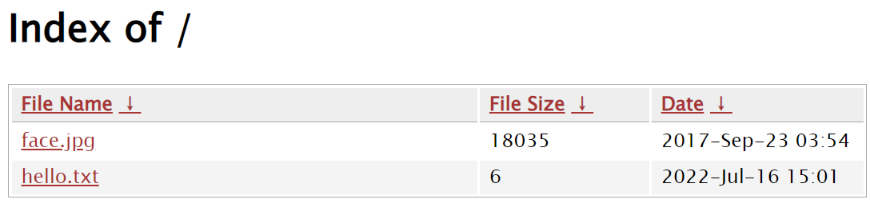
此外,fancyindex还有